One of the most fun tools I’ve used (since Ansible back in the day) is definitely Terraform. It changed completely my perspective with infrastructure-as-code tools and allowed the team I managed at gbh.tech to re-use infrastructure code across multiple projects.
By the time we fully mastered Terraform practices, we were able to spin up application environments in a matter of minutes.
So, how did we do it? How did we started?
Follow along and let’s find out 🙌🏽
How does Terraform work?
First thing first, never use a tool you don’t know how it works. That’s one of my golden rules. Through a quick overview in the Terraform docs, you will find that it’s simply an abstraction of APIs, granted by the usage of providers.
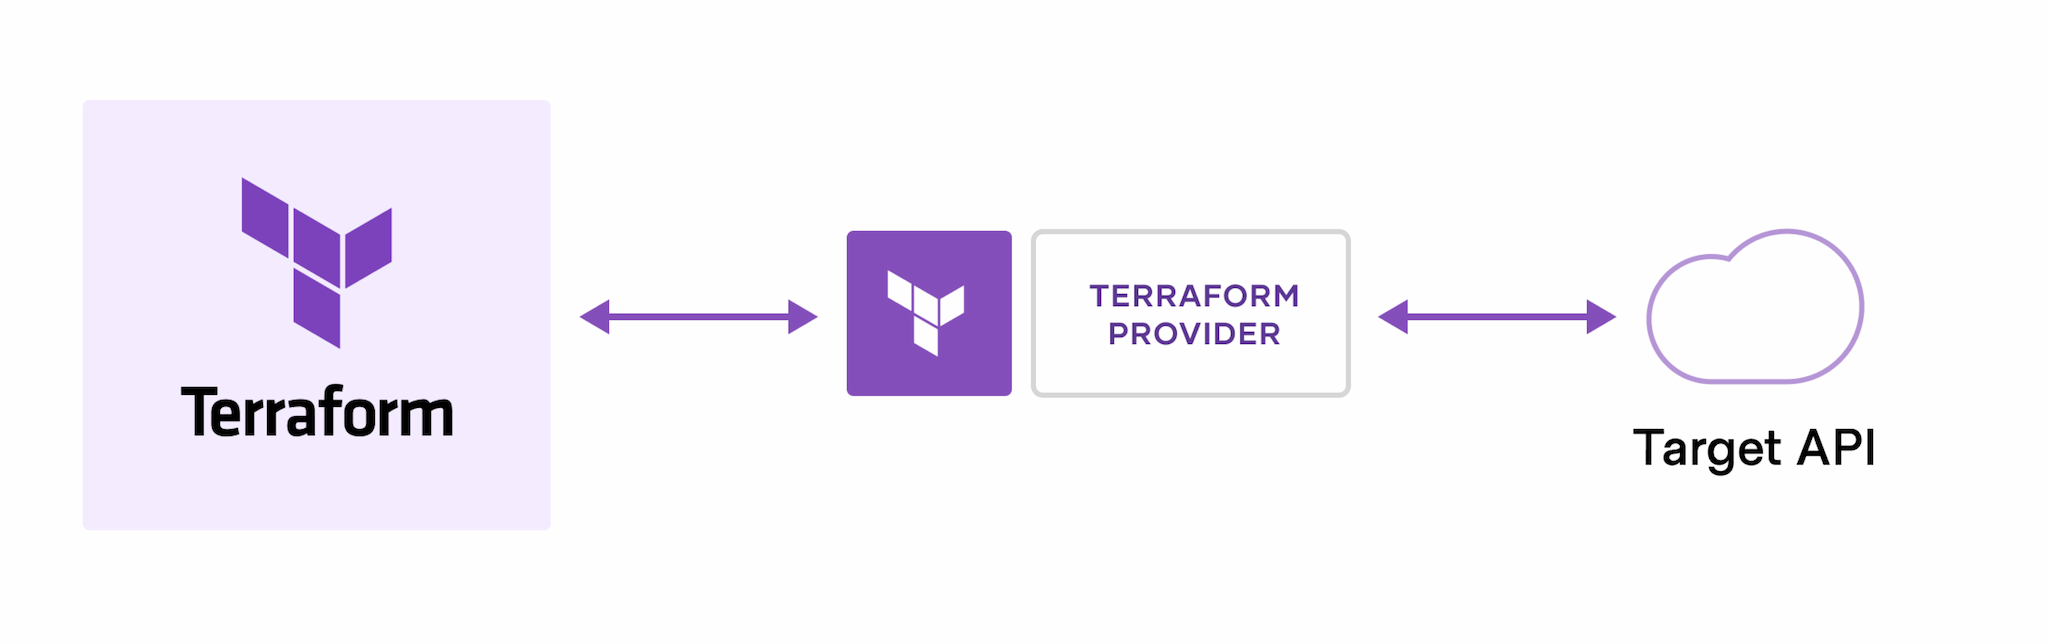
Providers allow the user to define resources in a human-readable config file and translate that to API requests to their specific provider.
Most common providers are AWS, Google Cloud Platform and Azure. But, as an agnostic IaC tool, providers go beyond those. You can also use providers such as GitHub, Cloudflare or Kubernetes, to name a few. Of course, not all of these are officially supported by Hashicorp Terraform maintainers, but the community is big and most of these are well-supported by their respective providers as well.
You can find all available Terraform providers in the Terraform registry.
State
An IaC tool is not complete until it knows how to remember the changes it makes to the resources it manages. Most importantly, it needs to compare new modifications added to the code to what’s already deployed, so you can plan ahead and understand the impact of the changes.
Terraform does this by using the state. Specifically, it uses a state file.
The state file is a JSON file named terraform.tfstate.
💡 The state file is plain-text JSON, so it must be saved in a secure location and manipulated with extreme care. A best practice is to use a backend, and safely store the state in a remote location.
Workspaces
Here’s where the magic happens. Terraform has a feature called Workspaces. It is only enabled for some backends that support it, and provides a way of managing multiple state files sharing the same configuration.
In a way, it is what allows you to “replicate” the state and manage its clones using the same unique code base.
Depending on the backend, workspaces can be created in a different way. The most common way is to use the Terraform CLI, which is also the main way to interact with Terraform and all of its features.
Locals and Input Variables
Locals and Input Variables are very important to our approach of managing multiple application environments using Terraform. In simple words, these resources are what allow us to parameterized the state. We can adjust or change the behavior and metadata of all resources per workspace by using different values of these locals and variables.
Configure multiple environments
Putting everything we’ve discussed so far, let’s see how we can approach creating multiple environments using the same configuration files.
For the convenience of this example, we’ll use AWS as our main provider.
I’m assuming you have already setup a local empty git repository, have Terraform installed, and your AWS credentials set up.
Using a remote backend
We’ll use S3, so the first thing I’m going to do is create a backend.tf
file with the following content:
terraform {
  backend "s3" {
    bucket = "my-state-bucket"
    key    = "/state"
    region = "us-east-1"
  }
}
We first create the terraform {} block, then the backend {} block.
Inside we define the name of our bucket, the key, and the bucket
region.
Selecting a provider
As mentioned before, we’ll use AWS. In the same backend.tf file, we’ll add
the required_providers {} and the provider {} blocks.
terraform {
  # [your backend block...]
  required_providers {
    aws = {
      source = "hashicorp/aws"
      version = "<version>"
    }
  }
}

provider "aws" {
  region = "us-east-1"
}
It’s important to note the provider block configures the provider and how
it’s going to be used in the current workspace. In this example, we configure
the provider to deploy all resources in the us-east-1 region.
It’s time to run terraform init. The init command initializes Terraform
backend and providers, by downloading all the required packages specified in
the configuration.
The
initcommand will create the.terraformdirectory and theterraform.lock.hclfiles. See more info about these in the Initializing Working Directories and Dependency Lock File.
With that, we’re ready to add some resources!
The main.tf file
A convention on Terraform code is to use a main.tf as the main file
for your root module. We’ll create this file and put a basic AWS resource:
resource "aws_s3_bucket" "foo" {
  bucket = "my-foo-bucket"

  tags = {
    Name        = "My Foo Bucket"
    Environment = ""
  }
}
🔍 Noticed the Environment tag? We’ll get to that later.
As you can see, this creates an S3 bucket named my-foo-bucket.
The state file will store it as resource.aws_s3_bucket.foo and
that is the resource’s reference (which we can use on other resources)
that may require it.
Creating an environment’s workspace
The default workspace of Terraform is default.
❯ terraform workspace list
* default
We are going to create two new ones:
❯ terraform workspace new 'stage'
# Created and switched to workspace "stage"!

❯ terraform workspace new 'production'
# Created and switched to workspace "production"!
Let’s set stage as the current workspace:
terraform workspace select 'stage'
And now, we’re set to do some magic.
Using a local to reference current workspace
Create a new locals.tf file in the root working directory.
Add the following content to it:
locals {
  environment = terraform.workspace
}
The local environment now has as value the name of the workspace
we’re currently in! Now, let’s use it to change the behavior of the
S3 bucket resource we previously defined.
resource "aws_s3_bucket" "foo" {
  bucket = "my-foo-bucket-${local.environment}"

  tags = {
    Name        = "My Foo Bucket"
    Environment = local.environment
  }
}
Running a plan
Let’s use terraform plan to see what our new resource will look like when
created:
ℹ️ The original output will be more verbose than this, I intentionally omitted some of it to make the example clearer.
❯ terraform plan
# Terraform will perform the following actions:
  # aws_s3_bucket.foo will be created
  + resource "aws_s3_bucket" "foo" {
      + acl                         = (known after apply)
      + arn                         = (known after apply)
      + bucket                      = "my-foo-bucket-stage"
      + force_destroy               = false
      [omitted output]
    }
# Plan: 1 to add, 0 to change, 0 to destroy.
Noticed the -stage at the end? That’s the work of our -${local.environment}
at the end of the bucket name in our resource definition. Nice!
To confirm it works, let’s change workspaces and run the very same plan again, without any code changes:
❯ terraform workspace select 'production'
❯ terraform plan
# Terraform will perform the following actions:
  # aws_s3_bucket.foo will be created
  + resource "aws_s3_bucket" "foo" {
      + acl                         = (known after apply)
      + arn                         = (known after apply)
      + bucket                      = "my-foo-bucket-production"
      + force_destroy               = false
      [omitted output]
    }
# Plan: 1 to add, 0 to change, 0 to destroy.
As you can see, the same resource definition can create multiple
versions of the same resource depending on the workspace thanks
to our local variable environment.
Of course, this is a very basic example of what you can do.
In another scenario, imagine you have a different domains for stage and
production. And you want to use the proper value depending on the environment,
you could do so with something like this:
locals {
  domain = (
    local.environment == "production"
    ? "foo.com"
    : "bar.com
  )
}
In the above example, we are now using a conditional expression. If the
environment value is production, its domain will be equal to foo.com.
Otherwise, the value is bar.com.
As the documentation mentions, it behaves similarly as a ternary operator in modern programming languages:
// If condition is true, do `true_val`, otherwise, do `false_val`.
condition ? true_val : false_val
The true power of IaC
With Terraform, you can define your complete application infrastructure and with some minor adjustments using locals and input variables, you can easily and quickly replicate and deploy a new application environment in a matter of minutes.
In the past this would’ve been a week’s worth of work between manually provisioning everything from scratch, ensuring everything is as it should be, and then waiting for the team members to test the new environment.
Now, I barely think of how much effort it would take after setting up the initial environment.
The power of IaC, at the palm of your hands.